
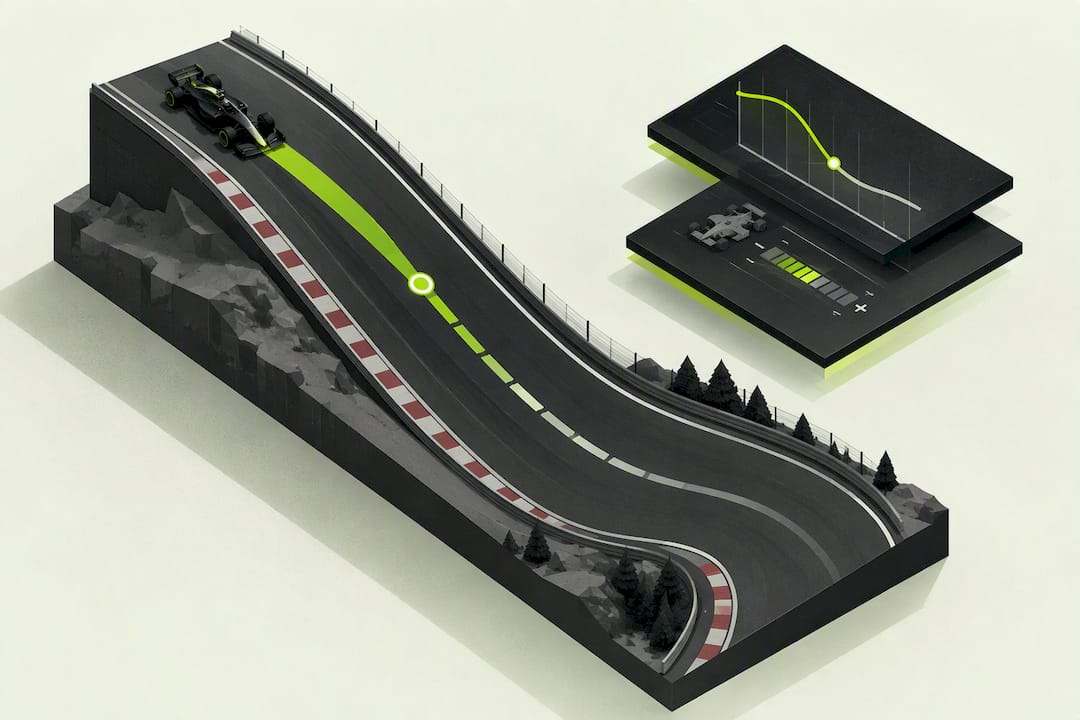
The single best fix for downhill sections in F1 26 is combining firm initial threshold braking with a controlled, gradual trail into turn-in, holding a small, steady brake pressure as you turn so the front stays loaded and the car rotates early. If rear instability shows up under heavy downhill braking, move brake bias a click or two frontward; in Time Trial or Qualifying, lean slightly rearward only if you can live with the added lockup risk. Try it on your next lap and watch the brake trace change.
TL;DR:
- Use early threshold braking combined with a gradual trail into turn-in to maintain front load and enable smooth car rotation on downhill corners.
- Test small, incremental adjustments to brake bias, moving slightly frontward if rear lockups occur during heavy downhill stops, and adjust separately for qualifying and race sessions.
- Incorporate structured practice drills such as freeze steering and bias sweep exercises, while monitoring telemetry for consistent brake pressure and lockup-free laps.
- In wet conditions, soften brake thresholds, start trail earlier, and favor a more front-biased setting to prevent rear lockups and spins.
- Virew AI analysis can identify specific brake pressure and bias issues impacting downhill corner performance, guiding precise setup and technique improvements.
Table of Contents
- Why Downhill Braking Behaves Differently in F1 26
- Core Downhill Braking Techniques That Actually Work
- Applying Downhill Braking Across Time Trial, Qualifying, and Race
- Practice Drills and Telemetry Checks for Downhill Braking
- Setup Changes That Make Downhill Braking More Repeatable
- Wet vs Dry Downhill Braking: What Changes
- Common Downhill Braking Mistakes and Their Fixes
- Coach Perspective: Your First 10 Laps of Downhill Braking Practice
- Turn Your Downhill Braking Data Into Real Lap Time
- Sources
- FAQ
Why Downhill Braking Behaves Differently in F1 26
Downhill entries carry extra forward momentum, and that changes the whole deceleration curve. The car's nose digs in earlier because weight transfer happens faster on a slope, which alters how quickly the front tires load up under braking. Dump the brake pedal too early on a downhill approach and you lose that front load right when you need it for rotation. That's when late understeer or a mid-corner push shows up, usually right where you thought you'd nailed the entry.
Trail braking solves this by keeping front tire load active through the initial steering input, which is exactly how trail braking supports rotation in any braking scenario, downhill or not. Pull up your telemetry after a lap and look at brake pressure against steering angle. If the brake trace drops to zero before the steering angle peaks, that's your rotation problem, sitting right there in the data.
Core Downhill Braking Techniques That Actually Work
Downhill corners punish sloppy pedal work more than flat ones, so the sequence matters. Threshold first, then trail, then release. Here's how to build each phase.
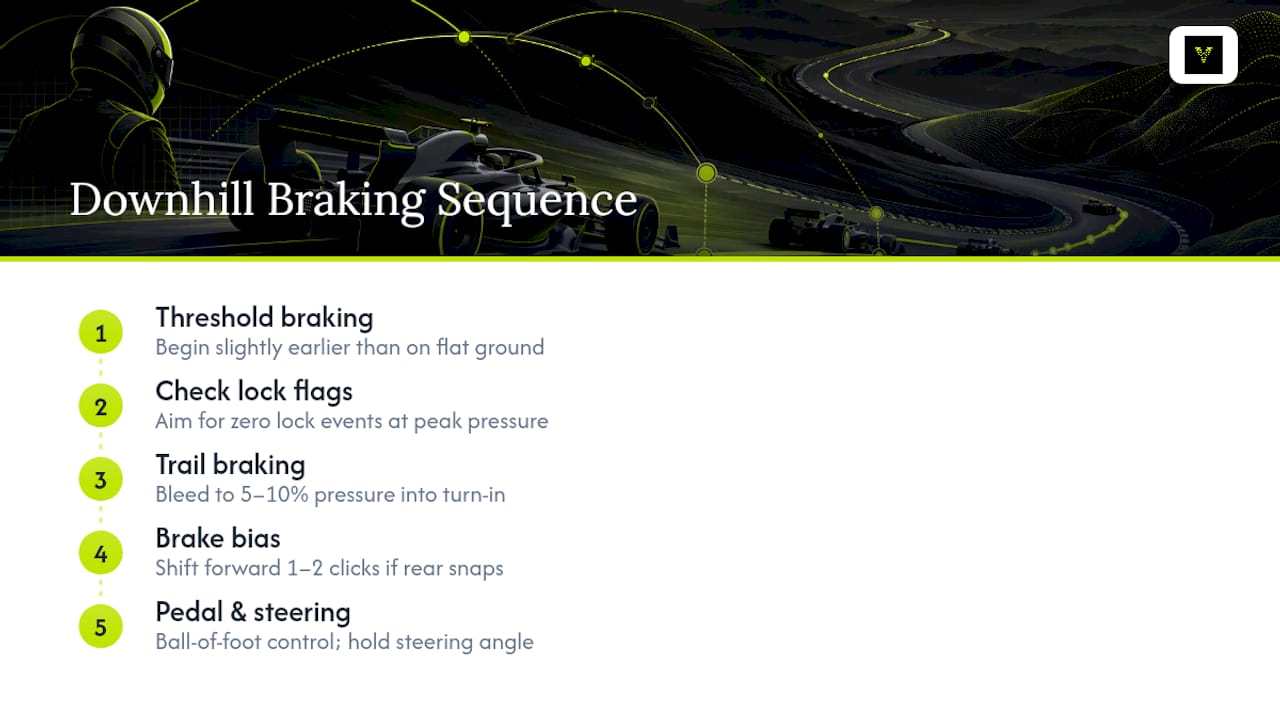
Threshold phase. Hit maximum deceleration without triggering a lock. On a downhill straight into a heavy stop, that threshold point comes slightly earlier than it would on flat ground because the car is already carrying more speed into the braking zone. Check your telemetry for lock flags. Zero lock events at peak brake pressure is the target, not just a fast time.
Trail phase. This is where lap time actually gets made or lost. Bleed brake pressure smoothly from threshold down into the low percentage range, often 5 to 10 percent as you settle into turn-in, rather than holding a long, heavy brake that just cooks front tire temperature. The goal is a steady nose load that helps the car rotate, not a drawn-out drag that kills your entry speed.
Brake bias. Test a front bias window for heavy downhill stops. If the rear steps out or snaps under braking, move bias forward. Bias adjustments are typically made in small increments, a click or two at a time, because even tiny bias shifts change entry behavior noticeably.
Pedal control. Use a ball-of-foot technique for finer pressure control, and check your pedal calibration for deadzone and linearity issues. A repeatable low-pressure hold matters more than raw peak force.
Skip heavy trail braking on corners that already over-rotate on entry, and on very low-grip surfaces where any trailing pressure risks snapping the rear loose.
Pro Tip: Hold your steering wheel angle steady once you start trailing until you feel the rotation settle. Most drivers unconsciously add steering lock while still on the brake, which is what actually causes the snap, not the brake pressure itself.
Applying Downhill Braking Across Time Trial, Qualifying, and Race
Session type changes what "correct" looks like on the same downhill corner.
- Time Trial: Prioritize a repeatable peak brake pressure and an aggressive, consistent trail shape. Run several identical laps back to back and overlay the brake traces. If they don't stack, your inputs aren't consistent yet, and no setup change will fix that for you.
- Qualifying: You get one lap, so tighter margins and later brake points are acceptable. A slightly more rearward bias can help rotation on that single lap, but only try it if you've already proven you can avoid lockups at that bias setting in practice.
- Race: Stability wins over rotation here. Favor a bias setting that protects the front tires across a full stint, avoid repeated lockups that flat-spot your rubber, and trail more conservatively to manage tire wear and keep your ERS deployment clean on exit.
The bias setting you use to qualify is rarely the one you want to race with. Treat them as two different setups, not one compromise.
Practice Drills and Telemetry Checks for Downhill Braking
Turning this into muscle memory takes structured reps, not random laps. Try this progression.
- Freeze steering drill. Brake into the corner, hold a small trailing pressure, and freeze your steering angle right at turn-in. Run five laps focused on nothing but this feeling of the front staying loaded.
- Exaggerated trail drill. Brake earlier than feels natural and hold the trail longer than feels right, then go straight from brake to full throttle at the apex. This drill teaches you what carried front load actually feels like versus what you assumed it felt like.
- Bias sweep drill. In Time Trial, change brake bias by one or two clicks per run and compare exit speed and lock events between runs. Small bias moves have an outsized effect on entry behavior, so log every change before stacking another one on top.
Your telemetry targets across all three drills: a smooth, descending brake trace with no sudden drop, minimal or zero lock flags, and earlier throttle application right after the apex. Record the brake pressure percentage at both turn-in and apex for each lap so you have numbers to compare, not just a feeling that one lap was "better." Running your saved laps through Virew's lap analysis surfaces exactly which downhill corners are losing you time and flags weak trail shapes automatically, which saves you from manually scrubbing through telemetry after every session.
Setup Changes That Make Downhill Braking More Repeatable
Technique only gets you so far if the car underneath you isn't set up to support it.
- Brake bias: Test small frontward moves specifically for heavy downhill stops, then document what each move does to your lap-to-lap consistency before locking them in.
- Differential: Reduce the on-throttle diff setting for slow downhill hairpins. It helps the car rotate on entry and exit without the rear overpowering itself once you're back on the throttle.
- Pedal deadzone and linearity: Minimize deadzone and set a smooth curve so low-percentage trail braking is stable rather than twitchy. This is where hardware matters most; load-cell pedals give you far more repeatable feel at low brake percentages than spring-based ones.
- Assists: Sensible assists can help while you're still learning the feel of trail braking. For serious Time Trial or Qualifying runs, turn them off and build the manual skill, because assists will mask the exact inputs you're trying to train.
Wet vs Dry Downhill Braking: What Changes
Wet downhill entries need everything softened. Lower your threshold pressure and start the trail earlier than you would in the dry, aiming for a gentler bleed that protects the little front grip you actually have.
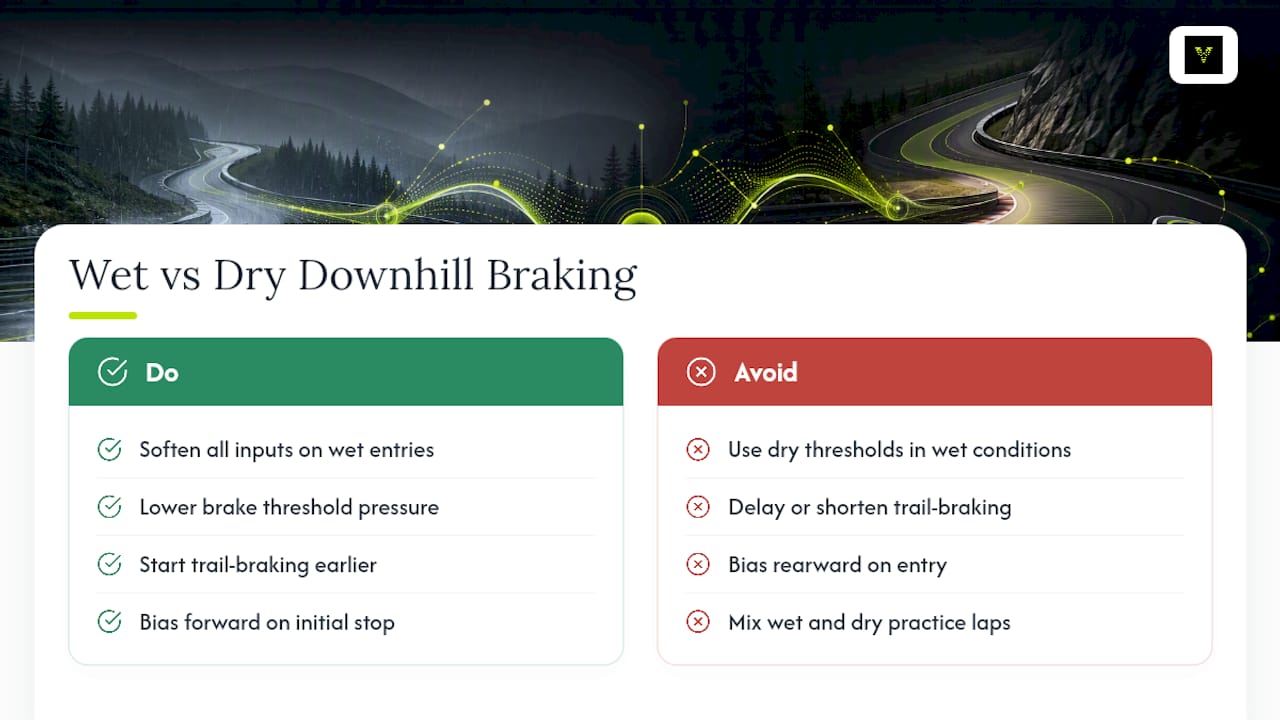
Bias forward for initial stability on heavy wet downhill stops, since wet conditions call for more conservative bias to avoid rear lockups and spins, then ease slightly rearward on exit once traction allows. Practice wet downhill laps as a separate session from dry ones. Check your telemetry specifically for lock spikes, which show up faster and more often on a wet surface than most drivers expect.
Common Downhill Braking Mistakes and Their Fixes
- Dumping the brake before turn-in. Fix it with the freeze-steering drill and deliberate low-percentage trail practice until the release feels slow on purpose.
- Flipping brake bias to extremes mid-session. Fix it by making one-click changes only, logging the effect of each before touching it again.
- Oversteering while trailing. Fix it by holding your steering input steady and reducing lock until exit power feels stable again.
Coach Perspective: Your First 10 Laps of Downhill Braking Practice
Run five laps threshold only, five laps adding a light trail, nothing else. Check three things every lap: brake pressure percentage right at turn-in, your lock count for the session, and how long it takes you to reach full throttle after the apex. If lock count isn't dropping by lap eight, you're releasing too fast, not braking too hard.
— Virew
Turn Your Downhill Braking Data Into Real Lap Time
Virew is built for exactly the problem this article just walked through: knowing your brake trace should look smooth and knowing whether yours actually does are two different things. Upload a lap and Virew's AI coaching breaks down your brake pressure, lockup events, bias usage, and how much time you're losing corner by corner on the downhill sections that matter most.
It handles Time Trial, Qualifying, and Race uploads, and treats wet and dry sessions as separate driving contexts rather than averaging them together, so the coaching cues actually match the conditions you drove in. Instead of generic setup tips, Virew analyzes the lap you actually drove and tells you in plain language where the trail braking broke down and what to change next. Start with the free tier for a limited number of monthly lap analyses, or upgrade to Pro for unlimited analyses and full history, both detailed on the Virew AI analysis guide. Upload your next downhill-heavy lap through Virew's lap analysis tool and see exactly where the time is hiding.
Sources
- Sim racing trail braking | step by step drill & common mistakes – SimXPro l Sim Racing Shop
- How to Trail Brake in Sim Racing (Drills + Setup)
- F1 Brake Bias: How Drivers Adjust Mid-Race
FAQ
What is the best downhill braking technique in F1 26?
Combine firm threshold braking with a smooth trail into turn-in, holding a small steady brake percentage while you steer so the front tire stays loaded. Pair this with a tested frontward brake bias window for heavy downhill stops, adjusting it in single clicks based on how the rear behaves.
How do I stop locking up on downhill braking zones?
Lockups on downhill entries usually come from braking too hard right at the point where weight is still transferring forward. Ease into threshold slightly earlier than you would on a flat straight, and check your telemetry for lock flags at peak pressure to confirm your threshold point is accurate.
Should I change brake bias for downhill corners specifically?
Yes. Test a slightly more frontward bias for heavy downhill stops if you notice rear instability under braking, moving in single clicks rather than large swings. In Race sessions, favor the more stable, front-biased setting to protect your tires across a stint rather than chasing rotation.
Does wet weather change downhill braking technique?
It changes almost everything about it. Lower your threshold pressure, start the trail earlier, bias slightly more frontward for initial stability, and treat wet downhill practice as a separate session from dry so you build the right feel for each condition.
Can Virew help me fix my downhill braking mistakes?
Virew analyzes your uploaded F1 26 laps and flags exactly where brake pressure, lockups, or bias usage are costing you time on downhill corners. Current pricing and features for the Free and Pro tiers are detailed on the Virew AI analysis page.