
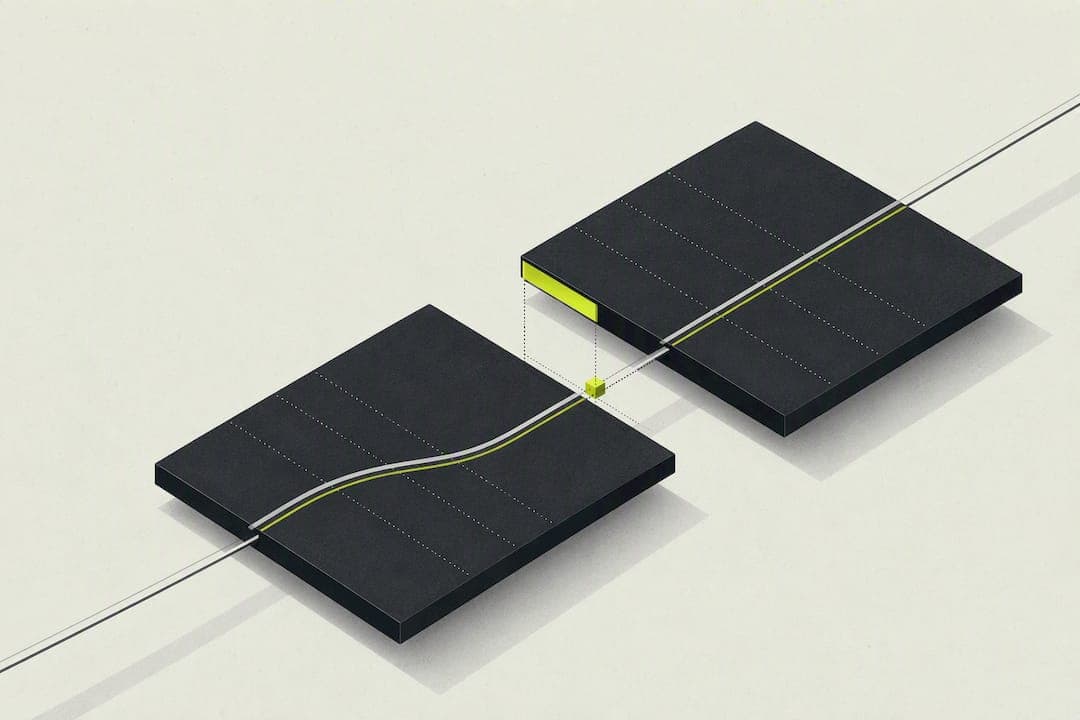
Measure your controller's resting axis drift over eight seconds, then set inner deadzone to that offset plus a 0.02 safety margin. For F1 26, run the smallest deadzone that eliminates drift to maximize steering precision on corner entry. Test the number on-track before trusting it, then move to platform tools like Steam Input or Xbox Accessories, to apply it permanently.
TL;DR:
- Measuring stick drift over eight seconds provides a precise deadzone target, preventing overly loose or tight settings during gameplay.
- Testing deadzone adjustments with real on-track laps helps avoid miscalibration caused by controller wear, sensor noise, or layered buffers.
- Applying deadzones in platform-specific tools requires careful attention to scale differences to ensure settings translate accurately across systems.
- Using a smaller, tested deadzone tailored to your controller and driving style balances responsiveness with stability, especially important in F1 26’s precise steering demands.
- Regular re-measurement and avoiding deadzone stacking are critical to maintain consistent control and prevent sluggish or overly aggressive steering.
Table of Contents
- What Are Deadzone Settings and Why Do They Matter?
- How Do You Measure and Test Your Deadzone Value?
- Where Do You Set Deadzone: Steam, Xbox, or DS4Windows?
- How Should You Tune Deadzone for F1 26 Specifically?
- Is Your Drift a Settings Problem or a Hardware Fault?
- How to Confirm a Deadzone Change Actually Worked
- How Do You Adjust Deadzone Settings for Accessibility Needs?
- What Are the Most Common Deadzone Setting Mistakes?
- Why Measurement Beats Guesswork Every Time
- Sources
What Are Deadzone Settings and Why Do They Matter?
Inner deadzone is the dead spot around center stick where small movements get ignored. Outer deadzone does the opposite job at the edge, treating anything past a certain point as full lock. Both exist because no controller sticks return to a perfect zero, so some buffer is unavoidable.
Anti-deadzone (sometimes called "outdead" in reverse) rescales the input after the deadzone cut so you don't lose sensitivity in the usable range. Without it, a big deadzone eats into your available steering travel and everything past the dead spot feels compressed.
- Inner deadzone ignores small, unintended stick movement near center.
- Outer deadzone caps input near full deflection to guarantee you can reach maximum lock.
- Anti-deadzone restores lost sensitivity by remapping the remaining input range.
Deadzones can stack in ways that hurt you without you noticing. Hardware applies a small tolerance, the driver layer (XInput on Windows, for example) often adds its own padding, and then the game applies another deadzone on top. Three layers of buffer compound into steering that feels sluggish and disconnected, even when each individual layer looks reasonable on its own.
Sensor type matters too. Older potentiometer sticks wear mechanically and drift more over time, while Hall-effect and TMR sticks use magnetic sensing with far less physical wear, which usually means tighter, more stable resting values for longer.
How Do You Measure and Test Your Deadzone Value?
Guessing a number and hoping it feels right is how most players end up with a deadzone that's either too loose or twice what they actually need. A short, repeatable measurement fixes that.
- Run an 8-second rest sample. Put the controller down, untouched, and use a gamepad deadzone calculator to log the X and Y axis noise. Note the largest offset recorded on either axis.
- Apply the formula. Recommended inner deadzone equals that largest idle offset plus a 0.02 safety margin. A stick reading 0.03 of drift at rest gets a working deadzone around 0.05, translated to whatever scale your platform uses.
- Enter the value and test it in F1 26. Run a lap in Time Trial that includes a long straight (Baku's back straight works well) and a medium-speed corner (Suzuka's Degner is a good stress test). Watch for wandering on the straight and for correction inputs mid corner.
- Iterate downward, then step back. Lower the value until you see drift creep in, then raise it by one small increment to your last stable reading. Document that number and re-test after any firmware update or reconnection, since the resting offset can shift.
Pro Tip: A browser-based tester's recommended value is a conservative floor, not a final answer. Always confirm it feels right in an actual F1 26 session before locking it in.
Most testers report a practical working range that varies depending on controller age and condition, so don't be surprised if your number lands well outside a "default" preset.
Where Do You Set Deadzone: Steam, Xbox, or DS4Windows?
Where you apply the number depends entirely on your setup, and mixing up the scale is one of the fastest ways to undo a good measurement.
- Steam Input: Open the game's Controller Configuration, then go to Additional Settings for stick input. Steam uses a 0 to 1 decimal scale, so a measured offset of 0.05 stays as 0.05 here, not 5.
- Xbox Accessories app: Go to Configure, then Stick configuration, and adjust the deadzone slider. This app works in percent, so a 0.05 decimal reading becomes roughly 5%. Save the profile to the controller itself so it carries over to console play.
- DS4Windows: For a DualSense on PC, open your Profile, hit Edit, then Other Settings, and adjust Left or Right stick deadzone independently. This is also where you catch driver-layer inflation before it stacks with in-game settings.
- PS5 native controls: The base DualSense has no deep system-level deadzone menu, so you're mostly relying on per-game sliders. A DualSense Edge changes this, since its stick module profiles let you fine-tune deadzone and curve directly on the controller.
Save separate profiles for Time Trial versus Race sessions if your platform allows it. A setting tuned for a fresh controller at the start of a stint might need a slightly different profile after 40 laps of stick wear during a long race weekend.
Pro Tip: Route your controller through Steam Input rather than relying on Windows' generic XInput layer. It stops driver-level deadzone from silently stacking with the value you just measured.
How Should You Tune Deadzone for F1 26 Specifically?
General deadzone advice gets you close, but F1 26 punishes sloppy steering inputs harder than most genres because lap time is decided in tenths through corner entry and mid-corner correction.
- Time Trial: Push for the lowest safe deadzone your measurement supports. Single-lap pace rewards maximum steering resolution, and Time Trial has no tire or fuel variables to complicate the picture.
- Qualifying: Use the same baseline as Time Trial, but watch for over-correction on flick sections like Eau Rouge or the Silverstone Maggotts-Becketts sequence. Add one small increment if you see twitchy snap-back under load.
- Race: Build in a slightly larger safety buffer than your qualifying number. Tire degradation and fuel load shift how the car reacts to the same input, and a tighter margin gives you room before drift becomes a real problem late in a stint. Re-check your setting after any long run, since stick wear and hand fatigue both creep in over 50-plus laps.
On steering linearity, favor a linear mapping over an aggressive curve whenever your platform offers the choice. Research on steering-system linearity found linear models produce lower steering effort and better lane-keeping than nonlinear ones, and that holds true for consistent corner entry in F1 26. If your steering feels twitchy on straights but fine in corners, that's usually a linearity or sensitivity mismatch, not a deadzone problem. Raising deadzone to mask it just costs you precision in the corners where you need it most.
Pro Tip: Validate any change with a fixed test lap. Count how many steering corrections you make on the same straight and compare lap-time variance across five attempts before and after the tweak.
Is Your Drift a Settings Problem or a Hardware Fault?
A high deadzone that "fixes" drift isn't always a fix. Sometimes it's a controller telling you it's wearing out.
- Step 1: Measure resting offset. Run the same rest-sample test from earlier. A reading above roughly 0.05 on a normalized scale is a sign of hardware wear rather than something software should be masking.
- Step 2: Confirm with a zero-deadzone test. Temporarily set deadzone to its minimum and watch the input reading on a live display. Visible wandering with no touch confirms drift, not user error.
- Recalibrate first. Most platforms have a built-in calibration tool, and it's the free, fast first step.
- Update firmware and drivers. Manufacturers occasionally patch stick sensor behavior; an outdated driver can misreport resting values.
- Switch to a wired connection. Bluetooth or wireless dongles introduce their own small variances that a USB cable removes.
- Clean or replace the stick module. Dust and debris around the potentiometer or magnet housing cause a lot of "phantom" drift.
- File a warranty claim if the controller is still young. A deadzone above 20% is a workaround, not a solution, and it usually means the stick needs attention rather than a bigger buffer.
If none of that resolves it, try the controller on another device entirely. If the drift follows the controller, it's the hardware. If it disappears, look at your console or PC's own USB port and driver setup instead.
How to Confirm a Deadzone Change Actually Worked
Feel is unreliable. A deadzone change that seems smoother on the first lap can still be costing you time if you're not measuring it properly.
A helpful coaching workflow runs on a simple loop: Drive, Analyze, Improve, Repeat. Upload a lap set before your deadzone change and another set after, then compare what the analysis actually shows instead of guessing from memory.
- Compare braking points across both lap sets to see if steering corrections near turn-in shifted your braking stability.
- Check the frequency of small steering corrections through a specific corner, since fewer corrections after the change usually means the new deadzone is working.
- Look at lap-time delta and consistency spread across a stint rather than judging off a single fast lap.
The lap analysis breaks down exactly where a session gained or lost time, which turns "this feels better" into a number you can trust before you commit to a setting for race day.
How Do You Adjust Deadzone Settings for Accessibility Needs?
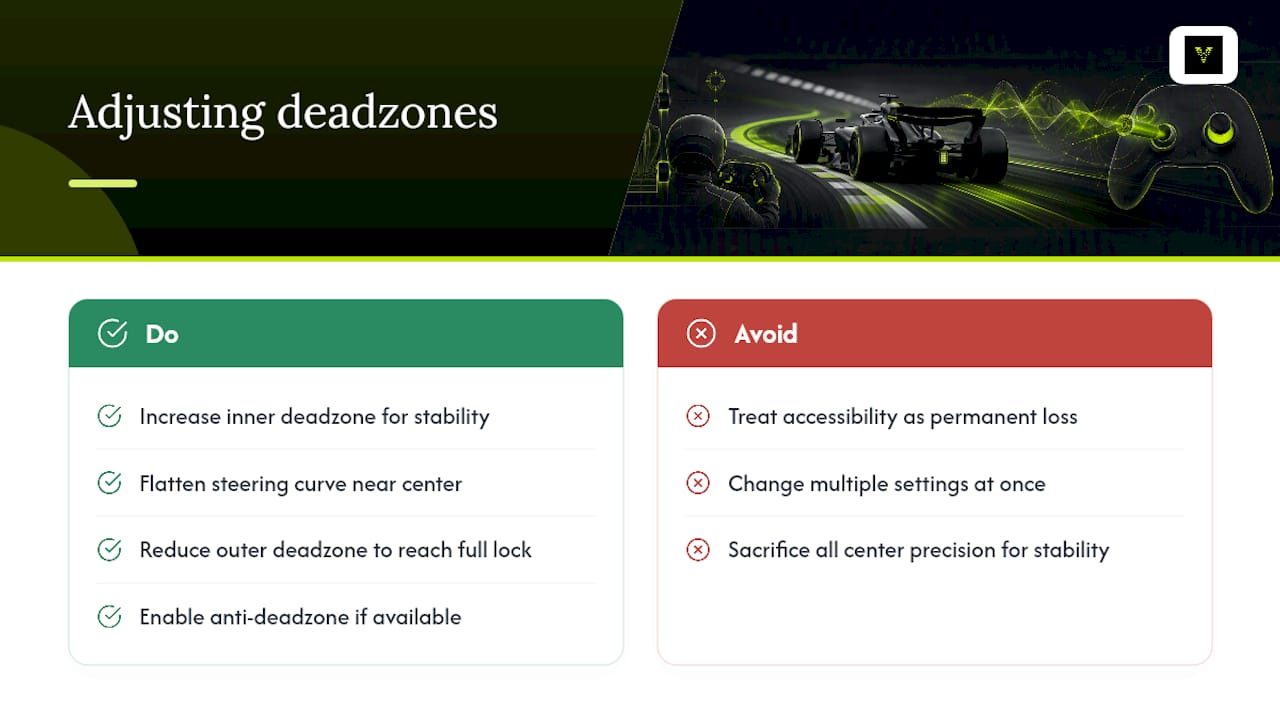
Deadzone tuning isn't only about chasing lap time. For drivers with limited fine motor control, tremor, or reduced grip strength, a larger inner deadzone than the measurement formula suggests can be the right call, and that's a legitimate use of the setting rather than a compromise.
A slightly wider deadzone filters out unintended micro-movements that would otherwise translate into unwanted steering input, which matters more for comfortable, sustained play than shaving tenths off a lap. Pair a larger inner deadzone with a flatter steering curve near center, if your platform allows separate curve adjustment, so you're not sacrificing all precision to get stability.
Outer deadzone adjustments matter here too. If reaching full lock is physically difficult or uncomfortable, reducing the outer deadzone threshold lets the game register full steering angle before the stick reaches its physical limit. That single change can make tight hairpins like Monaco's Loews corner far less demanding without altering your center-stick feel at all.
Anti-deadzone settings, where available, help recover sensitivity lost to a larger comfort-driven deadzone. Rather than treating accessibility settings as a fixed tradeoff against performance, use the same test-and-iterate approach from the measurement section: adjust one variable, run the same test lap, and judge the result on how it actually feels and performs rather than assuming a bigger number always means worse racing.
Xbox Accessories and DS4Windows both support saving multiple profiles, so you can maintain a comfort-focused profile alongside a competitive one without re-tuning every session.
What Are the Most Common Deadzone Setting Mistakes?
Most bad deadzone experiences come from a small handful of repeatable errors, and every one of them is avoidable once you know what to look for.
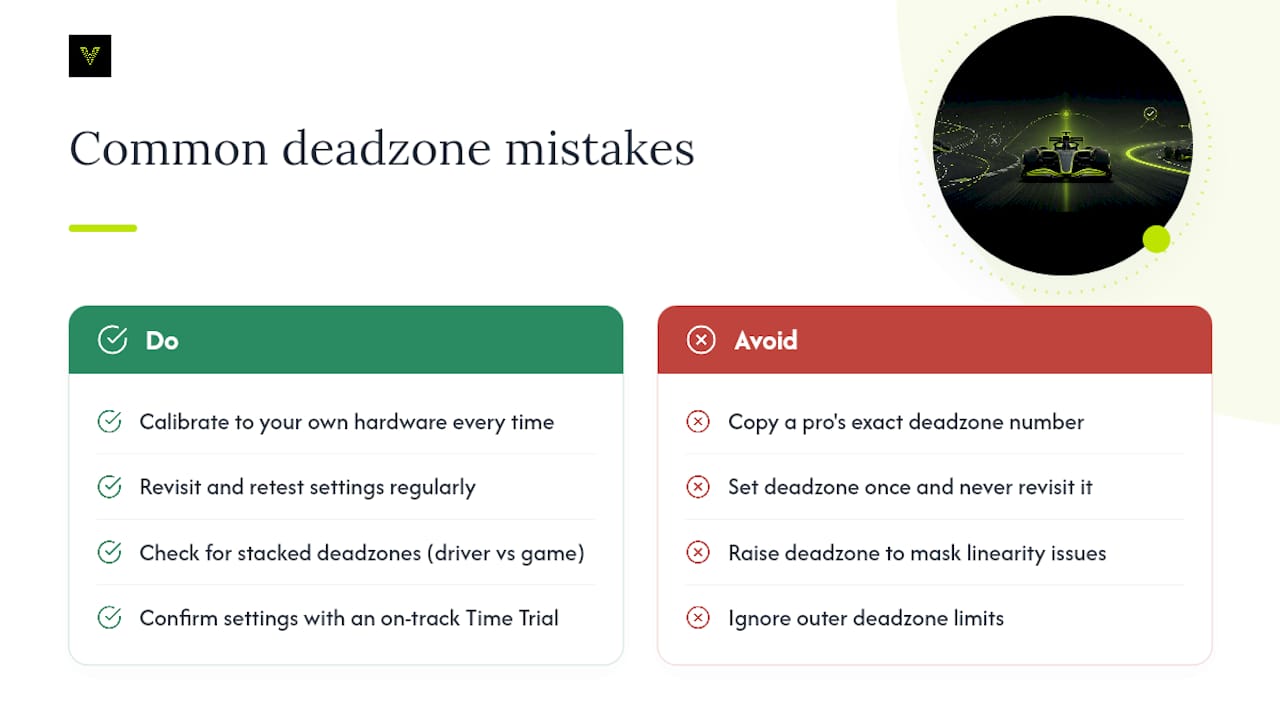
Copying a pro's exact number. Individual controller wear, sensor type, and hand size all vary, so a value that works for a streamer's fresh Hall-effect stick can feel completely wrong on your older potentiometer pad. Calibrate to your own hardware every time.
Setting deadzone once and never revisiting it. Sticks wear gradually, and a number that was perfect three months ago may now be masking creeping drift instead of just accounting for normal tolerance.
Stacking deadzones across layers without realizing it. Setting a deadzone in the driver layer and then again in-game, without checking whether either is passing through unfiltered, compounds into steering that feels numb near center for no obvious reason.
Using deadzone to fix a linearity problem. Twitchy behavior on straights combined with sluggish response in corners usually points to steering curve or sensitivity settings, not deadzone. Raising deadzone to cover for it costs you precision exactly where F1 26 rewards it most.
Skipping the on-track test. A number that looks clean on a tester can still feel wrong in a real braking zone under load. Always confirm with an actual Time Trial lap before trusting a setting for race day.
Ignoring outer deadzone entirely. Focusing only on the inner value while leaving outer deadzone at default can quietly cap your maximum steering angle, which shows up as an inability to fully commit to tight corners like the Nürburgring's Karussell in older DLC content or Suzuka's final chicane.
Why Measurement Beats Guesswork Every Time
The conventional advice on deadzone settings treats it like a one-time checkbox: find a number online, punch it in, move on. That's backwards. Controllers wear differently, sensor types behave differently, and what worked for someone else's DualSense is a starting guess for yours at best.
What the evidence actually supports is a measurement habit, not a magic number. Run the rest sample, apply the offset-plus-margin formula, and treat the result as a hypothesis to test on track rather than a final answer. The players who struggle most with steering feel usually haven't measured anything. They've either copied a number or nudged a slider until it felt "okay" on a single lap.
Prioritize the smallest deadzone your hardware can honestly support, then validate it with real lap data instead of impressions. That's where a tool like Virew earns its place, turning a subjective feeling into a measurable comparison of corrections, consistency, and lap time before you commit to a setting for race day.
— Virew
Sources
- Controller Deadzone Test | Gamepad Deadzone Calculator
- Controller Deadzone Test and Calibration Guide
- What Is a Controller Deadzone? How to Test and Set It (2026)
- The effect of steering-system linearity, simulator motion, and truck driving experience on steering of an articulated tractor-semitrailer combination