
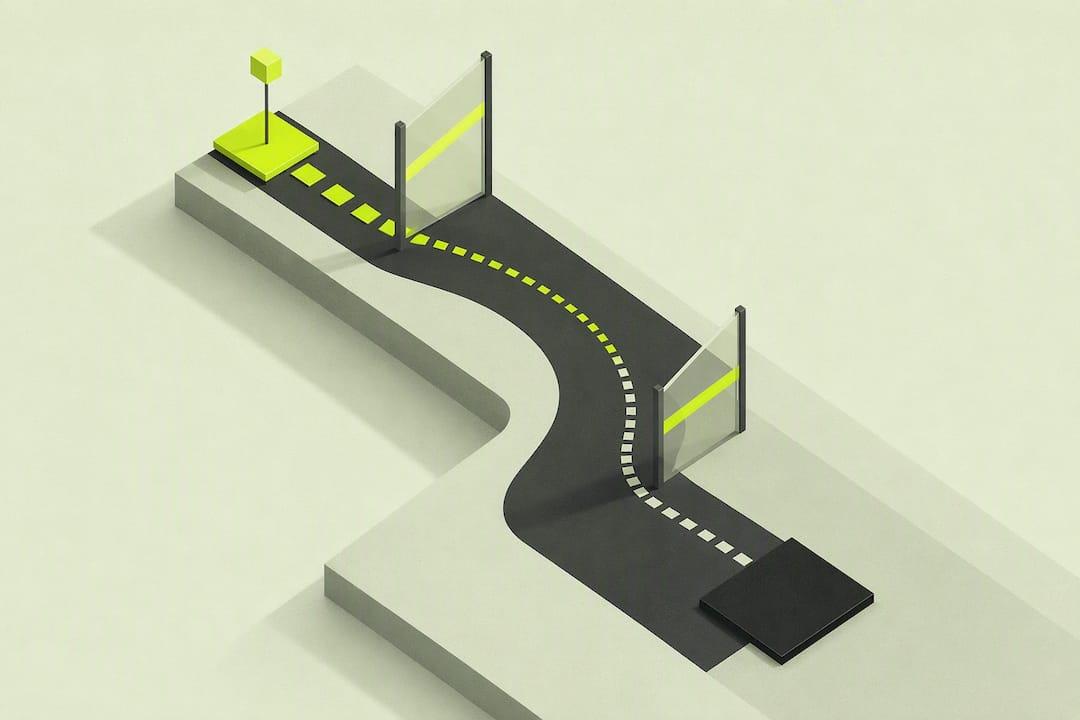
The fastest braking rhythm without ABS is a fast, assertive press to near the tire's limit, held for a beat, then released along a smooth curve as you turn in. Steering while still at full brake pressure is the single biggest cause of lockups and missed apexes, so get off the brake before you ask the front tires to turn. Check your controller or wheel calibration first, since a bad deadzone or saturation setting will sabotage even perfect technique, then run the release-curve drill below for ten laps before judging anything else.
TL;DR:
- Using a threshold braking technique with an assertive initial press and smooth release inward helps maximize grip and reduce lockups without ABS.
- Proper controller calibration, especially deadzone, saturation, and linearity settings, is crucial for consistent brake modulation and avoiding hardware-induced lockups.
- Adjusting brake bias incrementally based on lockup tendencies improves stability, with front bias around 55-60 percent suited to high-speed circuits and rear bias for tight, technical layouts.
- Recognizing temperature swings and managing brake cooling are essential, as cold brakes lock earlier while overheated brakes fade, affecting stopping distances.
- Regular practice with telemetry analysis tools, like Virew, accelerates learning by providing specific feedback on brake pressure traces, lockup points, and release curve adjustments.
Table of Contents
- What Is Threshold Braking Without ABS in F1 26?
- Controller and Wheel Settings That Make Manual Braking Consistent
- Adapting Braking for Time Trial, Qualifying, and Race
- Drills, Telemetry Checks, and Targets to Train ABS-Off Braking
- Brake Bias Basics and How to Adjust for ABS Off
- Brake Temperature Management Without ABS
- Car Setup Adjustments to Complement ABS-Off Braking
- Mental and Physical Habits That Improve Braking Focus
- Virew's Approach: How AI Lap Analysis Speeds Up Braking Skill
- Try a Braking-Focused Lap Analysis With Virew
- Sources
- FAQ
What Is Threshold Braking Without ABS in F1 26?
Braking without ABS in F1 26 means the game no longer intervenes to release brake pressure when a wheel locks, so every gram of stopping force runs through your thumb, finger, or foot instead of a computer. Threshold braking is the technique that replaces it: you press to the point just below lockup, hold near that limit, and taper off as you approach the corner. Done right, it's faster than ABS-assisted braking because you're not leaving grip on the table waiting for the system to react.
Threshold press, release curve, and trail braking explained
Most players brake too gently at the start and too aggressively at the end, which is backward. Here's the sequence that actually works.
- Hit the brake hard, immediately. A quick, assertive stab to somewhere around 90 to 100 percent pressure gets you to peak deceleration fastest. Hesitant, ramped-up braking wastes distance because you spend the first half-second below the tire's real stopping capacity.
- Hold near the threshold, not past it. You'll feel or hear the front tires start to scrub or lock. Back off just enough to stay on the edge without fully committing to a slide.
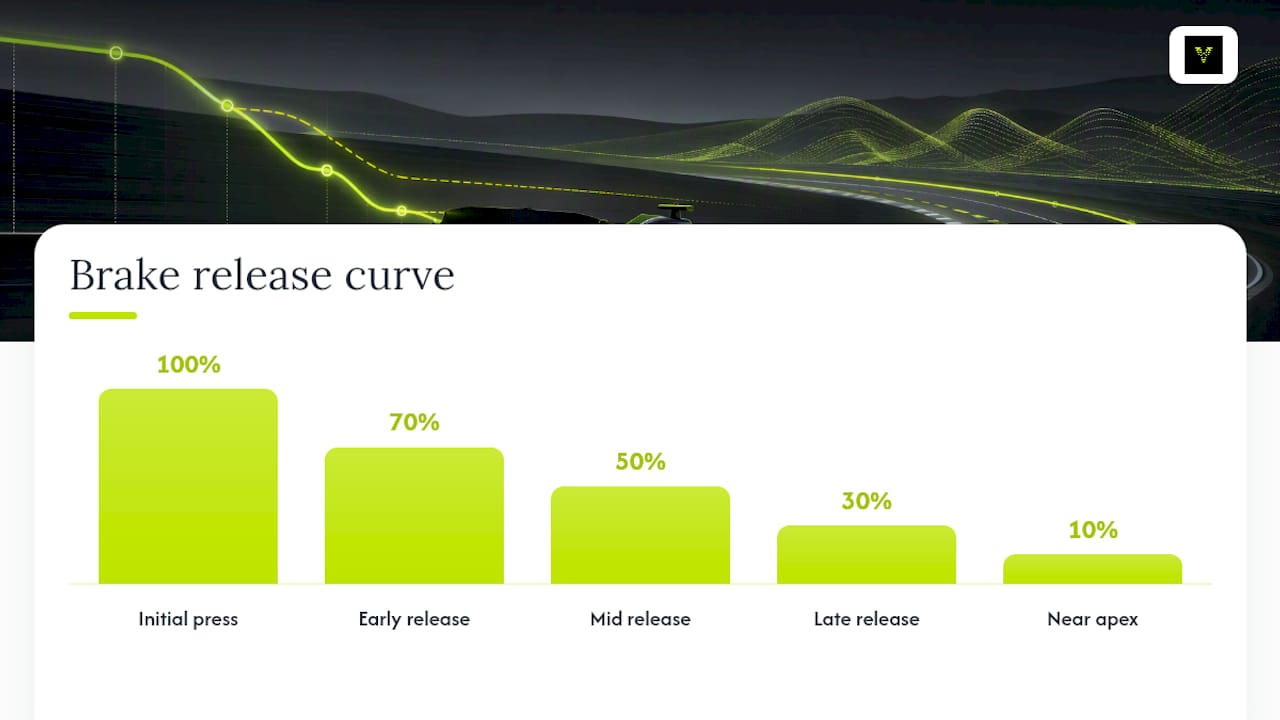
- Release on a curve, not a cliff. Practice a shape like 100 to 70 to 50 to 30 to 10 percent as you move from straight-line braking into the corner. Sim-racing guides that focus on controller braking technique point to this exact rhythm as the foundation for consistent releases.
- Hand off from brake to steering, not both at once. Trail braking means carrying a small amount of brake pressure while you start to turn, but the total demand on the tire, braking plus cornering, has to stay under its grip limit. As one guide puts it, trail braking works when combined inputs stay under the tire's limit, not when you try to brake and turn hard at the same time.
- Release faster as speed drops near the apex. Downforce falls away as you slow down, which means the tire can't take as much brake pressure the closer you get to the corner. Coaching resources note that required brake pressure falls as downforce drops, so holding the same pressure into a slow corner that worked at high speed will lock the front tires almost every time.
The three failure modes to watch for: stabbing and dumping the brake in one motion (you lose the threshold hold entirely), releasing too late (you carry speed past the apex and run wide), and holding full brake into the turn (guaranteed lockup or a nose that won't rotate). Each one shows up clearly on a brake trace once you know what to look for.
Pro Tip: Practice the release curve on a single corner in isolation before trying it on a full lap. Pick one heavy-braking zone, like Turn 1 at Bahrain, and do twenty reps of nothing but the approach and release.
Controller and Wheel Settings That Make Manual Braking Consistent
Bad calibration will wreck good technique before you even get to apply it. Three settings control how your input translates into in-game brake pressure, and getting them wrong is the most common reason players think they're "bad at braking" when they're actually fighting their own hardware.
- Saturation caps how much physical input is needed to reach 100 percent brake. Controller players should generally run it low, often near 0, unless the trigger genuinely can't reach full pressure on its own.
- Linearity shapes the response curve. A mid-range setting, roughly 25 to 35, softens the initial bite and makes low-percentage holds near the apex far easier to control.
- Deadzone removes dead travel at the start of the input. Too much deadzone means your early, gentle pressure does nothing, which kills your ability to modulate near the threshold.
These starting points come from controller-specific calibration guidance built specifically around trail braking on a gamepad.
To test your setup, open the input display and watch the trace while pressing smoothly from 0 to 100 percent. A healthy curve rises evenly with no flat spots or sudden jumps. Wheel and pedal users tend to have fewer deadzone issues but should still check for spiking near full travel, a common hardware quirk that mimics a lockup even when your technique was correct. If your controller has vibration feedback, use it as a rough lockup cue, but telemetry traces are the more reliable check when vibration is absent or too subtle to notice mid-corner.
Adapting Braking for Time Trial, Qualifying, and Race
Braking technique doesn't change across session types, but how aggressively you apply it should. Treating a Race stint like a Time Trial lap is one of the fastest ways to end up in the gravel or on worn-out tires by lap 20.
- Time Trial: push the boundaries and measure everything. This is where you experiment with release timing and even brake bias, since a single mistake costs you nothing but a reset. Track your absolute braking window, the earliest and latest point you can brake and still make the corner, and work that window smaller over sessions.
- Qualifying: accept controlled risk for a faster entry. One clean lap matters more than five safe ones, so it's reasonable to brake later and closer to the true threshold than you would in a race. Manage lockup risk by keeping your release curve sharp rather than by braking earlier, which just costs time without actually reducing risk.
- Race: prioritize repeatability over the last tenth. A brake lockup that flat-spots a tire in lap 3 can cost you more time over a full race distance than a slightly conservative entry ever would. Release fractionally earlier than your qualifying laps and lean toward a marginally more forward brake bias to protect the tires.
Across all three, the metrics worth tracking stay the same: lockup count per lap, the delta between your actual braking point and your best recorded one, and how consistent your apex speed is corner to corner. A Time Trial session with zero lockups but a wide braking-point delta tells you technique is fine but rhythm isn't locked in yet. A Race stint with climbing lockup counts as the laps go on usually points to tire wear changing your braking distances, not a sudden loss of skill.
Drills, Telemetry Checks, and Targets to Train ABS-Off Braking
Feel alone won't tell you if you're actually improving, which is why coaching resources recommend measurable targets over subjective impressions whenever possible. Three drills build the skill in layers.
- Brake-release rhythm drill: pick one heavy-braking corner and repeat the 100 to 70 to 50 to 30 to 10 percent release curve for 15 to 20 laps. Track whether your apex speed becomes more consistent lap overlap, not just faster.
- Lockup-count drill: deliberately brake right at the threshold for a full session and log every lockup. The goal isn't zero lockups immediately, it's a downward trend over three or four sessions.
- 10-lap consistency block: run ten laps focused only on hitting the same braking point and apex speed. A tight spread here matters more than one fast outlier lap.
| Drill | What to measure | Target after 3 to 5 sessions |
|---|---|---|
| Brake-release rhythm | Apex speed consistency | Reduced lap-to-lap variance |
| Lockup-count | Lockups per session | Clear downward trend |
| 10-lap consistency block | Spread of braking point and apex speed | Tighter clustering, fewer outliers |
Your telemetry checklist should cover three things every time: the brake pressure trace shape (smooth curve versus jagged spikes), your speed at the moment you begin braking, and any lock flags the game or your capture tool records. Comparing two runs side by side on the same corner is the fastest way to see exactly where a lap went wrong, which is the same principle behind lap analysis that shows where time is actually lost rather than just reporting a final time.
Brake Bias Basics and How to Adjust for ABS Off
Brake bias controls the front-to-rear split of braking force, and it matters more once ABS stops correcting your mistakes for you. A bias set too far forward makes the front tires lock easily under hard braking, which is the most common ABS-off complaint from players switching over from assisted braking. A bias set too far rearward risks the rear stepping out under trail braking, especially in slower, technical corners.
A forward-leaning bias, typically in the 55 to 60 percent range toward the front, tends to suit stable, high-speed circuits where straight-line stopping matters more than rotation. A more rearward setting helps cars rotate into slow corners, useful at tight, technical layouts where you need the nose to turn in willingly under trail braking. Neither number is universal, since it depends on the car's aerodynamic balance and your own braking style.
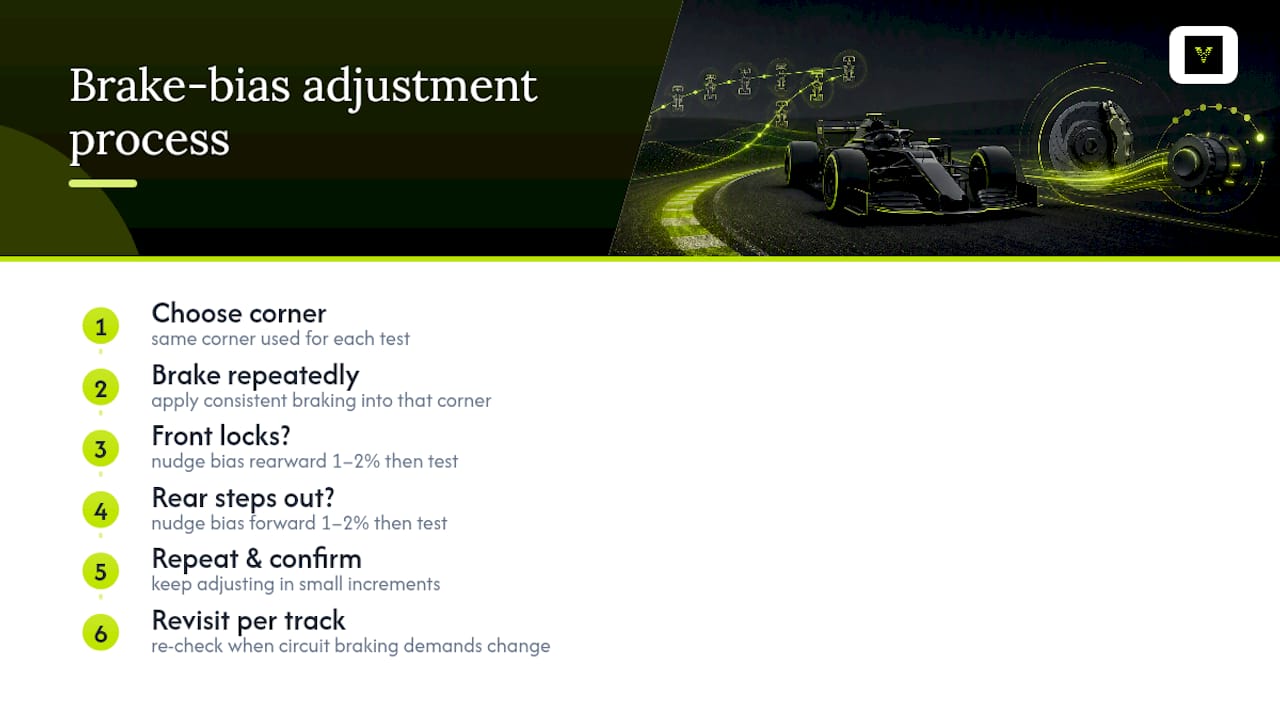
The practical way to find your setting is to adjust in small increments, one or two percent at a time, and brake into the same corner repeatedly. If the front locks first, nudge bias rearward. If the rear feels loose or steps out under trail braking, nudge it forward again. This is a slower process than reading a generic number off a setup sheet, but it's the only way to match bias to how you actually brake without ABS smoothing over the mismatch. Revisit your bias whenever you change tracks with very different braking demands, since a setting that felt perfect at a high-speed circuit can feel twitchy the moment you hit a tight street-style layout.
Brake Temperature Management Without ABS
Brake temperature swings harder once ABS stops regulating how much pressure hits the discs on every lockup event. Cold brakes bite less predictably, which shows up as inconsistent stopping distances in the first sector or two of a lap, especially after a slow out-lap or a safety car period. Overheated brakes, on the other hand, tend to fade, meaning the same pedal or trigger pressure produces noticeably less stopping force than it did a few laps earlier.
Without ABS smoothing over these swings, you feel temperature problems directly as changes in how early the front locks under threshold braking. A brake that's running cold will lock sooner than expected for the same input, tricking you into thinking your technique got worse when the real issue is temperature. Building a couple of extra braking inputs into an out-lap, even light ones on a straight, helps bring temperatures into a workable range before you commit to a hot lap.
During a race stint, watch for a pattern where lockups start appearing on laps where you've just had a long period of light braking, like following behind a slower car. That's often temperature drift, not a sudden mechanical issue or lapse in focus. Adjusting your release curve slightly earlier for a lap or two after any unusually light-braking period is a simple fix that costs you almost nothing in lap time and prevents a lockup that could cost several tenths or a spin.
Car Setup Adjustments to Complement ABS-Off Braking
Suspension and tire settings shape how forgiving your car is once ABS stops catching your mistakes, so setup becomes part of your braking toolkit rather than a separate concern. Stiffer front suspension tends to sharpen brake response and rotation into the corner, but it also narrows your margin for error, since small input mistakes translate into bigger weight-transfer spikes that trigger lockups. A slightly softer front setup trades a little bit of that sharpness for a wider window where an imperfect release still results in a clean corner entry.
Tire pressures matter just as much. Lower front pressures generally increase the contact patch under heavy braking, which can help delay lockups, though it comes at some cost to peak grip once the tire is fully loaded. Higher pressures sharpen initial bite but shrink your margin for error at the threshold, the same trade-off you see with suspension stiffness.
If you're consistently locking the front under threshold braking despite clean technique, the fix isn't always more practice, sometimes it's a setup that's fighting you. Try softening front suspension by a step or two and dropping front tire pressure slightly before assuming the problem is purely technique. These adjustments interact differently depending on the car and circuit, which is why setup notes built around driving the current-season cars are worth checking before locking in a braking-focused setup for a specific track. A setup that suits Monza's long straights and heavy braking zones won't necessarily suit a tight, low-speed circuit where rotation matters more than outright stopping power.
Mental and Physical Habits That Improve Braking Focus
Braking without ABS punishes tension. A driver gripping the wheel or controller too hard tends to stab at the brake instead of pressing smoothly, since fine motor control gets worse under physical tension, not better. Relaxing your grip, even slightly, and consciously softening your initial press instead of jabbing at it, often improves consistency faster than any setup change.
Focus drifts are the other quiet killer. Many lockups happen not because a driver lacks the technique, but because attention wandered for a fraction of a second right at the braking point, often while thinking about the next corner or a mistake two laps earlier. Treating each braking zone as its own separate task, rather than one continuous stream of the whole lap, keeps attention anchored where it actually needs to be.
Fatigue compounds both problems. Late in a long Race stint or after a dozen consecutive Time Trial attempts, reaction time slows just enough that your release curve starts late, and that lag shows up as lockups that weren't there earlier in the session. Short breaks between long practice blocks aren't wasted time, they're what keeps your inputs sharp enough to actually benefit from the reps you're putting in. A five-minute break every 20 to 30 minutes tends to preserve input quality far better than pushing through fatigue for a marginally longer unbroken session.
Virew's Approach: How AI Lap Analysis Speeds Up Braking Skill
Virew runs on a simple loop: Drive, Analyze, Improve, Repeat. You upload a lap from F1 26, and instead of just seeing a final time, you get a breakdown of exactly where the braking trace deviates from what's fast, whether that's a lockup, a bias mismatch, or a release curve that tapers too slowly.
The output includes the actual brake pressure trace for your lap, flagged lockup moments, and specific suggestions tied to what the data shows, not generic advice. If your release consistently lags at one corner, that gets called out directly rather than buried in an overall score. That kind of track-specific, trace-level feedback closes the gap between guessing what went wrong and knowing exactly what to change on the next lap, which is a much shorter loop than trying to diagnose braking issues from memory alone.
— Virew
Try a Braking-Focused Lap Analysis With Virew
Virew is built for exactly the problem this article just walked through: knowing your technique should improve is one thing, seeing precisely where your brake trace breaks down is another. A braking-focused analysis pulls your brake pressure trace, flags lockup moments corner by corner, and suggests specific release-curve adjustments based on your actual input data, not a generic tips list.
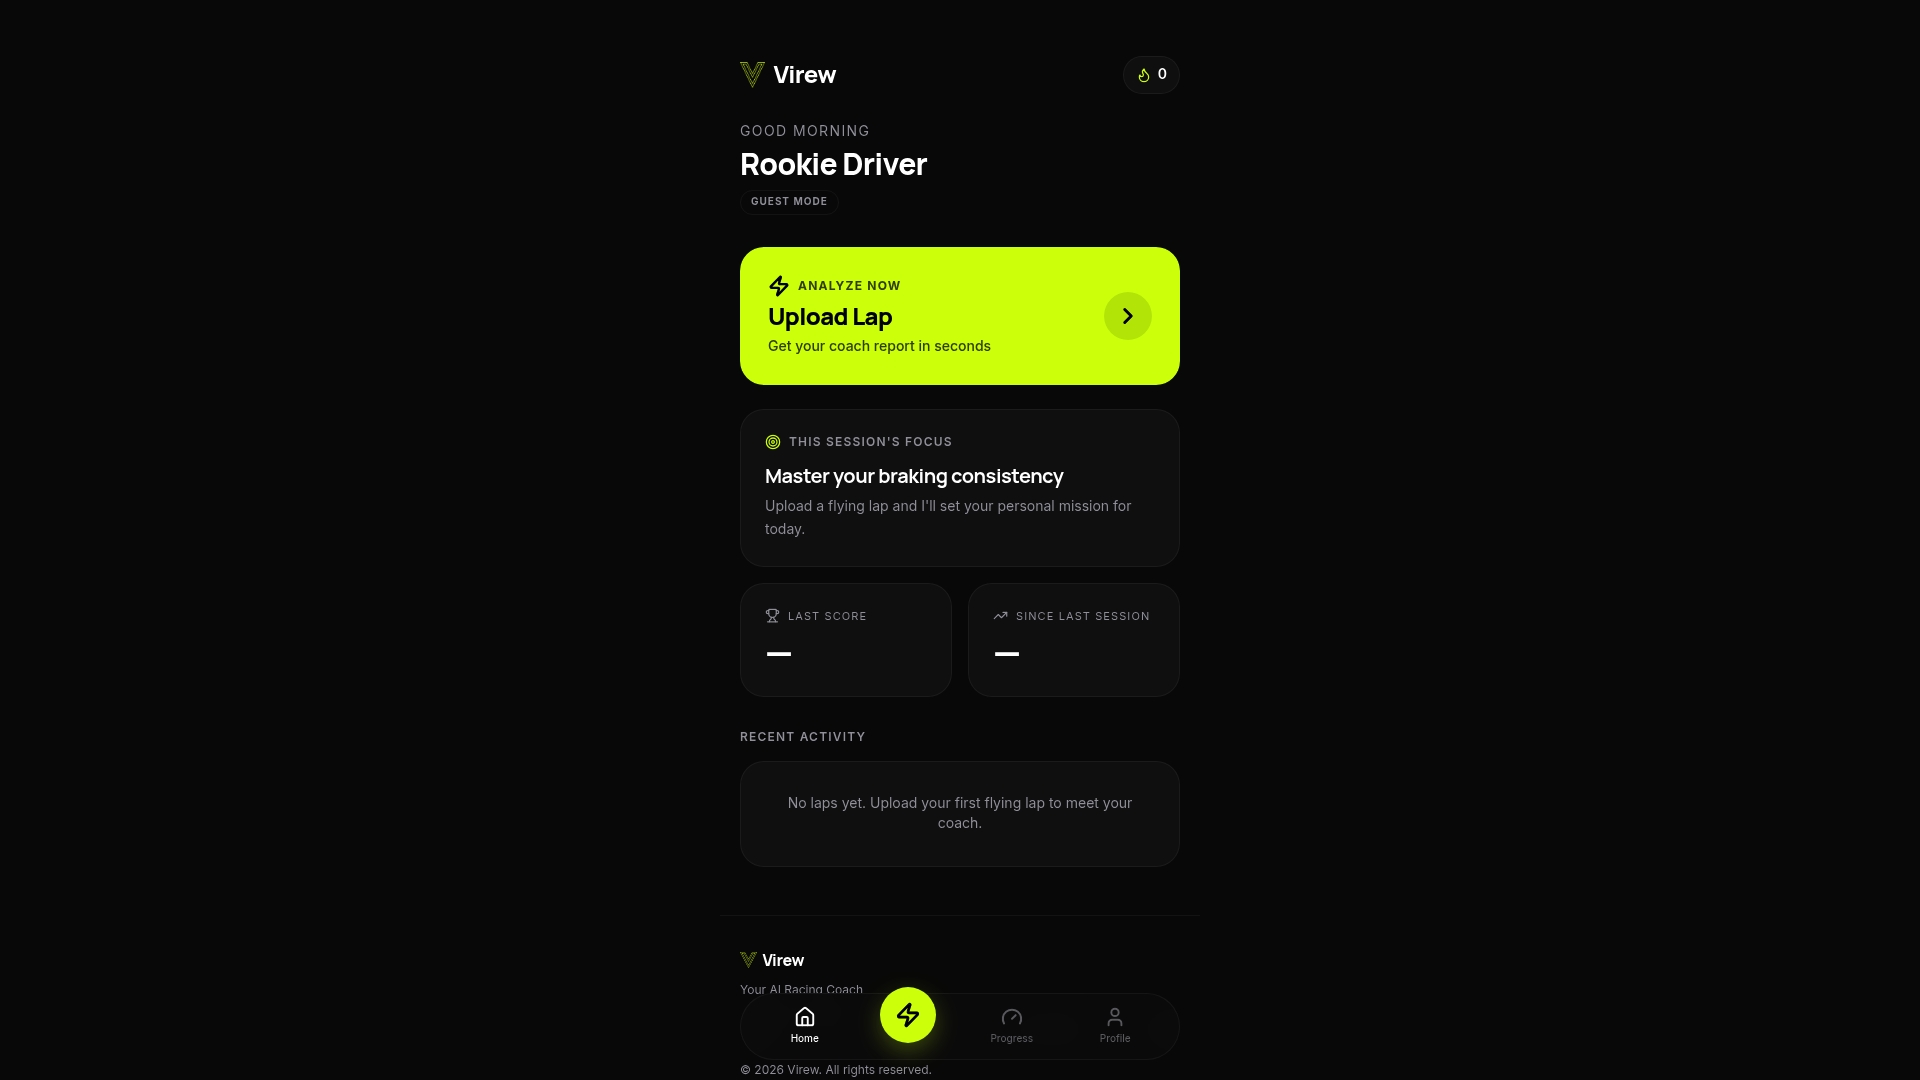
The fastest way to see it in action is to upload one clean Time Trial lap and run a braking-focused report through how to get faster in F1 26. If you want to understand what the first analysis will show before you upload anything, how to use Virew for the best F1 26 lap analysis walks through the process step by step. Pick a lap where you felt at least one braking zone was shaky, that's usually where the data tells the most useful story.
Sources
- F1 26 Season Pack Beginner’s Guide: Best Place To Start
- how to trail brake on controller in F125
- The Ultimate F1 2021 Braking Guide | How to Turn Off ABS | Improve Lap Times - DRIVER61
FAQ
Do I Need to Turn Off ABS to Get Faster in F1 26?
Not immediately, but competitive pace usually requires it since guides note that ABS reduces lockups but limits maximum performance compared to well-executed manual threshold braking.
What Is the Best Brake Release Curve for Manual Braking?
A tapering curve like 100 to 70 to 50 to 30 to 10 percent as you move from straight-line braking into the corner is a widely recommended rhythm for building consistent trail braking on controller.
Why Do I Keep Locking Up the Front Tires Without ABS?
The most common causes are a bias setting too far forward, holding full brake pressure too long as downforce drops near the apex, or a controller deadzone that's masking your actual input until it's too late to correct.
Should Brake Bias Be Different for Time Trial Versus Race?
Yes. Time Trial rewards experimenting with a more aggressive, rotation-friendly bias, while Race favors a slightly more forward bias that protects tires and reduces lockup risk over a full stint.
How Can I Tell If My Controller Settings Are Causing Braking Problems?
Watch the input display while pressing smoothly from 0 to 100 percent brake. Spikes, flat spots, or a delayed response point to saturation, linearity, or deadzone settings that need adjusting before you troubleshoot technique.